Also just found this DIY link too.
Showing posts with label Paint. Show all posts
Friday, January 7, 2011
DIY Swedish Style Paint Finish
I have a ton of furniture pieces to paint in my home at the moment. I am pondering whether or not I am going to try and paint a couple on my own. If I do, I definately want to try this Gustavian paint technique via Martha Stewart.
Friday, September 24, 2010
What a Lovely Lady: After Photos of Our Home Exterior
Here are some updated pictures of our major home elevation renovation. My apologies for the long overdue reveal. The project has actually been complete for a few months.
This home was built in 1959 and while it has great bones, the archicture of the home was seriously lacking. Here are few befores:
As you can see the house looked like it was sinking because it was covered by a brick pony wall and large shrubs.
Behind the brick wall was a garden of weeds and more weeds accented with gravel.
The front door; not very welcoming.
And here is the After! As you can see we knocked down the brick wall and removed all the existing overgrown plants. The outside was completely resided and everything was painted Martin Senour Linen Weave. We also added new cedar wood shutters and metal hardware to the second story windows and painted them Gaunlet Grey by Sherwin Williams.
Pulling down the wall gave us added bonus space for a proper front porch. We had Pennsylvania Bluestone installed to give the porch a solid foundation and expand the overall footprint. The chairs are from Ikea with custom outdoor pillow-makes for a great spot to enjoy a glass of lemonade or an afternoon cocktail.
We completely overhauled the front door by removing the old door and centering the new one with side lights. This made the front porch more symetrical, and with the custom gas lanterns and planters much more inviting. The door is painted Showstopper Red by Sherwin Williams and all though the picture is a little dark, the color is a gorgeous red.
A few other fun details are our new doorbell and mailbox.
(Can't figure out how to turn these photos in blogger photo uploader. Very annoying)
Hope you enjoyed the tour of our home exterior!
Sunday, May 16, 2010
Elevation Update: Progess on our home's exterior
You may be wondering why I've abandoned my blog for a while...let's just say its been for good reasons. First, I am working like crazy to finish client projects and keep the business on track. Below is a beautiful headboard slipcover I made for a local client. She bought the headboard from Restoration Hardware Baby and Child and we slipcovered it in a cotton linen blend with silver/gray flange trim and monogram. I wish this photo was better quality so you could appreciate how beautiful it really is.
Second, we are nearing the end of school and of course that means, school parties, events and lots of time consuming functions.
But third is one of the most exciting reason. We started the exterior overhaul of our house. Remember my original post here? Work is well underway and about 3 weeks behind schedule. Such is life, right? Here are a couple of pictures to share, but remember this is mid way through.
Some Befores
The ugly garden of weeds we purchased. This area was behind a 40" tall brick wall that covered the entire front of the house. I hated this area and knew the wall and weeds were goners.
The hideous and crumbling front door. Don't let the red paints fool you, they are test patches for the new door. The original door was a dark maroon.
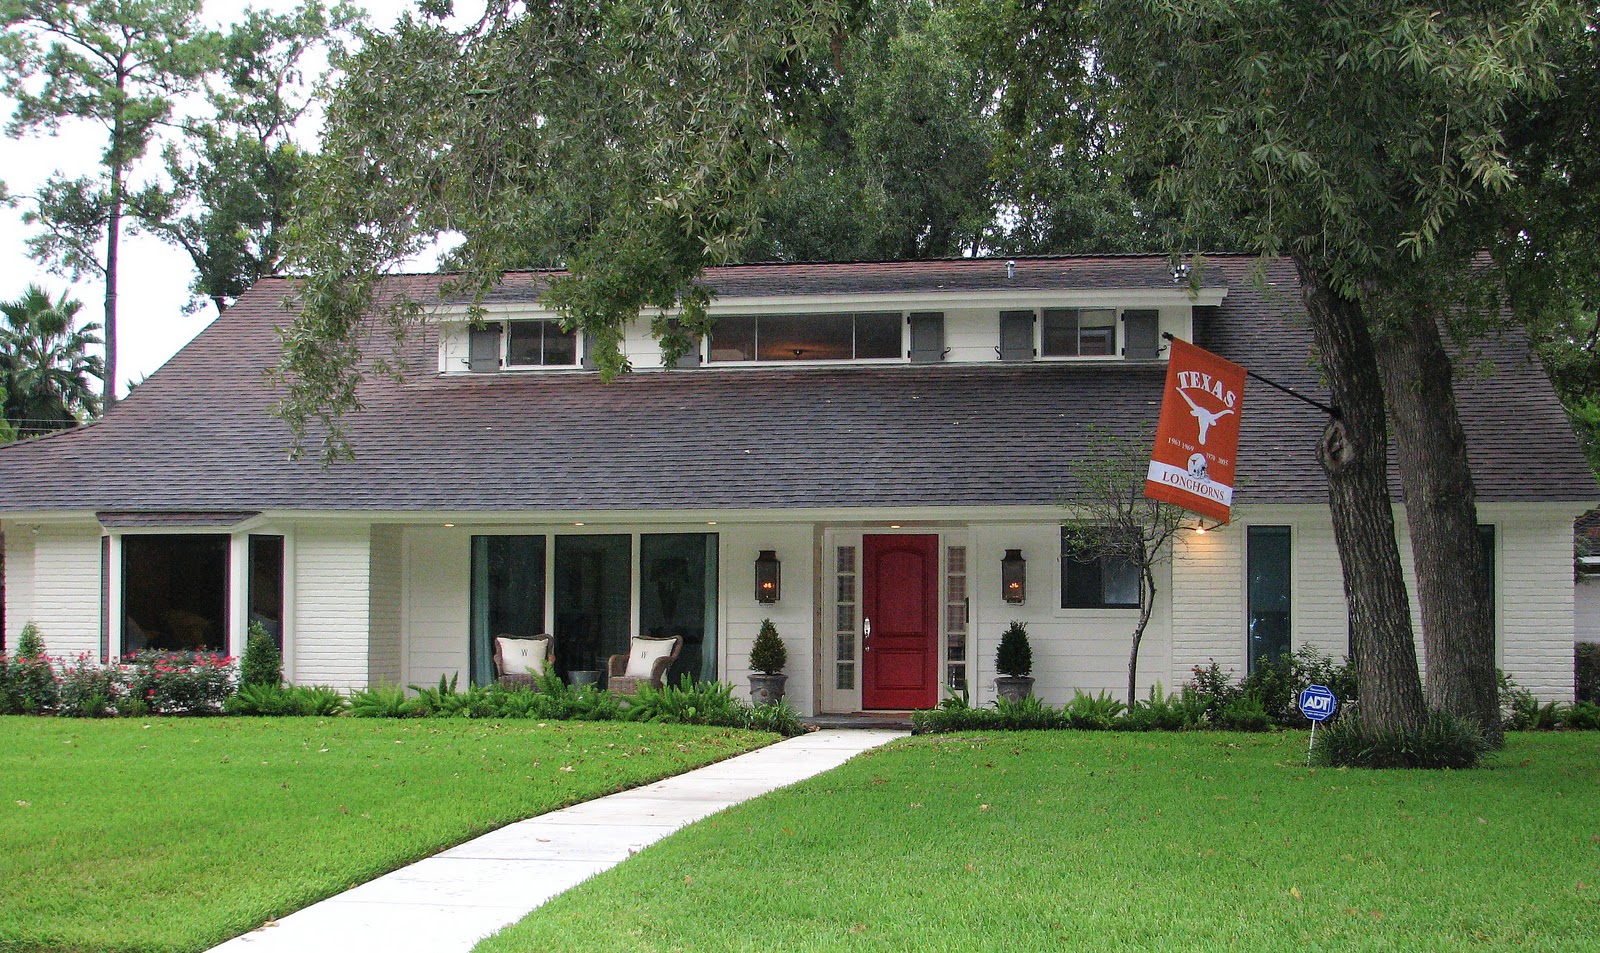
The Afters (halfway through completion)
As you can see we painted the entire house Martin Senour's Linen Weave cut in half. It gave the house a clean crisp new look and the color is a clean ivory. We tried a lot of ivory colors and most were too yellow or white. We also resided everything that wasn't brick and ripped out the brick wall. Those mature boxwoods in the front are moving to the side of the house to cover the A/C unit and all new low to the ground beds are going in.
You know you're in bad shape when dirt looks better than what was there before. We removed all the weeds, gravel and random plants and in its place will be a Pennsylvania Blue Stone patio for rocking chairs, wine and lazy afternoons.
Our new door and sidelights. I went for a clean simple design since the architecture of our home is simple and slightly modern. I have always dreamed of a red door so there it is and it's RED! It still needs about 3 more coats of paint, but I am telling myself I'll get used to it. It definitely screams WELCOME. The color is Show Stopper by Sherwin Williams.
Still to come this week are the gas lanterns that will flank the front door and new painted cedar shutters and hardware. I'll post again soon.
Labels:
Before and After,
Custom Designs,
Custom Monograms,
My Home,
Paint
Tuesday, March 2, 2010
Befor and After Part 2: My Built-in aka The Beast
This Before beast you see below was always slated for demo. But then it came time to take down the beast and well, it did not budge. Nope, not one bit. My husband took a sledge hammer to it and it bounced back. I am totally serious; the sledge hammer ricocheted off the built-in.
After the laughter subsided, we scratched our heads for some time as we figured out how to update this monster and make it aesthetically pleasing and suitable for modern electronics.
We started with paneling the back with brown fiber board to cover the tongue and groove back and give it a more custom look. Then we closed up the center column to make it appear as one custom piece and added simple molding detail to the doors. You may also notice we took out two shelves to the left so the flat screen could be added.
I painted the back of the bookcase Benjamin Moore's match to Ralph Lauren's Blue Shale. Ben M's color is called Atmospheric and we added large 8" Felicity Pulls in polished nickel from Restorations Hardware.
Not too shabby if I don't say so myself. At least she'll do for a while. We have far too many other projects in our dated dwelling to fixate on this one. By the way I have to add, I am cannot style a room worth a damn. The bookcase items are my very best attempt. I need to hire an interior stylist to help with my home.
Sunday, February 28, 2010
Before & After: My Fireplace
This week I plan to reveal a few more Before and Afters of the very slow progress of our home renovation. Today, the family room fireplace.
I always knew the fireplace had a lot of potential. Its true beauty was hiding behind a dated mask circa 1980. We had the guts of it completely rehabbed and outfitted with a gas log system. Once we pulled down the tiny ledge that was acting as a mantle and removed the brass cover, we were amazed at how big the fireplace really was.
What a difference the right paint colors and scale of a mantle can do for a fireplace. Every time I pass it I have to smile. We are so pleased with the end result.
The walls are Benjamin Moore Elmira White and the door and molding are BM Bennington Gray.
Before
After
I always knew the fireplace had a lot of potential. Its true beauty was hiding behind a dated mask circa 1980. We had the guts of it completely rehabbed and outfitted with a gas log system. Once we pulled down the tiny ledge that was acting as a mantle and removed the brass cover, we were amazed at how big the fireplace really was.
What a difference the right paint colors and scale of a mantle can do for a fireplace. Every time I pass it I have to smile. We are so pleased with the end result.
The walls are Benjamin Moore Elmira White and the door and molding are BM Bennington Gray.
Monday, February 1, 2010
Ice Cream Dreams and Waffles
I love this fun and vibrant breakfast nook featured in Traditional Home magazine. Styled after a traditional ice cream parlor, it's a setting perfect for food, crafts and fun.
This look would be so easy to duplicate in your own home. Striped walls with a pale barely there pink on the bottom and that table looks a lot like this oh so chic and affordable Ikea one.
A similar chandelier could be found here and spray painted white, then pull it all together with a set of vintage chairs recovered and whoa la! High style for a steal.
Labels:
Chic on the Cheap,
Design Love,
Design Tips,
Ikea,
Paint,
Room Designs
Tuesday, January 5, 2010
Gray is the new Black AND Blue
Incase you haven't noticed, gray is THE color of the moment. Interior designers, home furnishing stores and design magazines all claim gray is the color to have in every chic home. So...if you are anything like me and are a slave to trends (I love trendy touchs in a home) then you'll want to know how to incorporate a little gray without having to overhaul all your furnishings. By the way, any of these items below work for children and adult spaces.
Any of these rugs from West Elm would look beautiful in any room.
Even Ikea has a beautiful and affordable gray rug.
I also love these Chunky Tassel Throws from West Elm. The throw name is Platinum. How chic.
This Gray Damask fabric from Buyfabrics.com is one of my favorite affordable fabrics around.
And if you think gray is too drab for your taste, check out the color paired with yellow.
Restoration Hardware has painted all the interiors of their stores from their classic silversage blue to beautiful gray and the result is stunning.
These gorgeous antiqued candle sconces from Wisteria are painted a beautiful aged gray. They are sold as a pair and would be beautiful in a girls room.
Another option for lighting, this gorgeous platinum pendant shade from West Elm.
Love this gray hutch from Layla Grace.
For those of you who have some serious cash to spend, there is this beautiful Gustav Gray children's furniture set from Posh Tots.
Or if your cash flow is more in line with mine, then perhaps this more affordable Ikea option in dark charcoal gray. This vanity would make a perfect desk for a child. You can see the entire Edland line from Ikea here.
And yes even our beloved Pottery Barn is riding the gray train with their PB Teen line. Check out just one of their new bedding styles for boys. Gray, of course.
Labels:
Boy Rooms,
Chic on the Cheap,
Fabrics,
Paint,
Trends
Wednesday, October 21, 2009
A Touch of Turquoise
I am very taken with the color turquoise lately. Not too much turquoise but just a touch. I think it’s ever since I bought the play table chairs for my daughter. I love these rooms for the single bold statement.
Love only the turquoise walls.
Check out how TheStamfordwife.blogspot.com added just a touch to the inside of her changing table/dresser.
Here are few more items if your looking to add just a touch.
Retro Kitchen
Step stool accent via Kohls.com
The Coming and Going Coat Rack from Urbanoutfitters.com
A Morrocan Pouf from Tazi Designs
Turquoise Lamp from PBteen.com
Labels:
Accoutrements,
Design Tips,
Furniture,
Nursery Inspirtion,
Paint,
Trends
Subscribe to:
Posts (Atom)